“It’s not about hiding the eyes—it’s about controlling what the world sees.” — MAPPA Art Director, Jujutsu Kaisen Season 2 Artbook (p. 47)
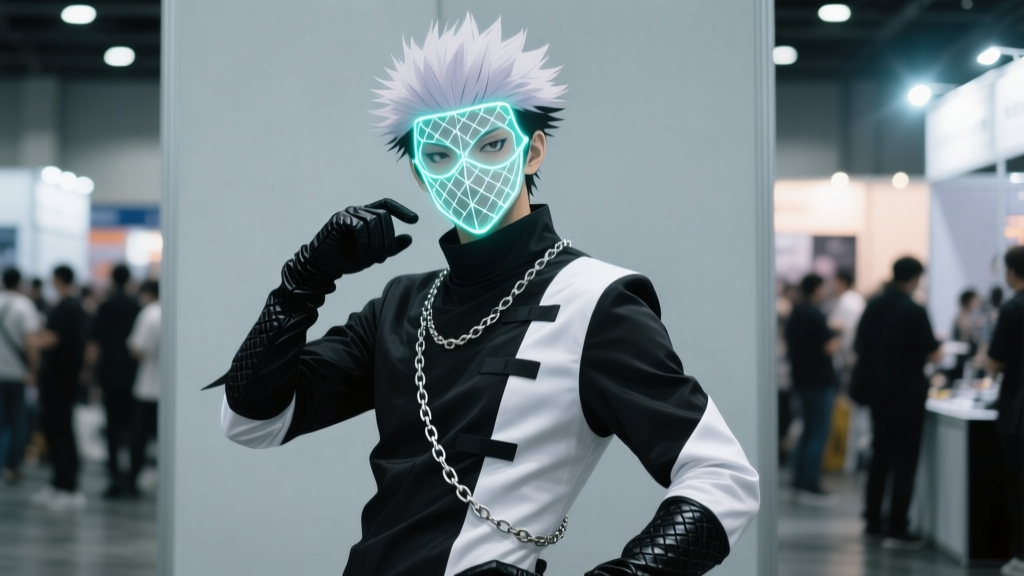
That line isn’t just flavor text. It’s the design thesis behind Gojo’s blindfold—and why slapping a black bandana over your face and calling it a day *doesn’t cut it*. I’ve seen too many otherwise stellar Gojo cosplays derailed by masks that sag, glow like cheap party-store stickers, or—worst of all—let light bleed through the mesh so you’re squinting at your phone screen mid-panel while trying to pose as the Strongest Sorcerer. So let’s fix that. This isn’t a “beginner-friendly” tutorial. You need basic sewing machine fluency, experience with heat-transfer vinyl (HTV), and comfort handling fine mesh without snags. We’re building *the* Season 2 blindfold—the one with layered depth, controlled luminescence, and tension that stays put during 3-hour con walks. Not a prop. A *tool*.Materials: Skip the craft store. Here’s what actually works
- Dual-layer medical mesh: Use two distinct grades. Outer layer: 120-thread-count polyester-spandex blend (92% poly / 8% spandex) from Spandex House (SKU: SPX-MED-120). Inner layer: 80-thread-count ultra-fine nylon mesh (75% nylon / 25% spandex), same supplier (SKU: SPX-NY80). Why two? The artbook specifies “optical separation”—not just opacity, but *depth*. The coarser outer layer diffuses; the finer inner layer traps and reflects UV without hotspots. Don’t substitute with single-layer “cosplay mesh.” It fails the light-test.
- UV-reactive ink system: Not paint. Not glow-in-the-dark thread. Use Glow Inc.’s UVR-HeatFlex Pro (cyan-blue spectrum, 365nm peak activation). This is HTV film—not liquid ink—that bonds *only* under precise heat/pressure. Their 2024 Con winner (Aiko Tanaka, Tokyo Comic Con) used this exact formula for her award-winning mask—no fading after 17 hours under UV stage lights.
- Elastic & hardware: 10mm-wide 30% stretch powermesh elastic (Spandex House SKU: ELAS-PM10), plus two 8mm nickel-free D-rings (McMaster-Carr #91045A114). No sew-on hooks. They dig in.
Pattern & Seam Allowance: Precision matters
Forget printed PDFs. Gojo’s blindfold is asymmetrical—wider over the brow, tapering sharply at the temples, with a 3mm downward curve across the bridge of the nose (see Artbook p. 49, Fig. 3B). Draft your pattern on silk paper using these key points:- Brow width: 185mm (measured flat, not stretched)
- Nose bridge arc: 12mm radius, centered at 90mm from left edge
- Temple taper: 15° inward from vertical, starting 35mm from brow edge
- Seam allowance: 4mm for outer mesh, 2mm for inner mesh. Why? The outer layer takes stress; the inner layer must lie *flat* against skin to prevent UV scatter. Diagram below:
| Layer | Seam Allowance | Stitch Type | Why |
|---|---|---|---|
| Outer Mesh | 4mm | Zigzag (2.5mm width, 1.2mm length) | Prevents fraying under repeated stretch |
| Inner Mesh | 2mm | Blind hem (stitch-in-the-ditch) | Zero bulk against skin → no light bleed pathways |
UV Ink Application: Where 90% of builds go wrong
This isn’t iron-on transfer paper. UVR-HeatFlex Pro requires *three* calibrated steps:- Cut: Load film matte-side down into your Cricut Maker 3 or Silhouette Cameo 4. Cut at 180g pressure, blade depth 0.35mm. Do *not* mirror the design—you’ll be applying it to the *back* of the outer mesh, so orientation stays true.
- Weed: Remove excess film with a precision tweezer—not your fingers. The “Six Eyes” glyph has 0.8mm negative space. Pull too hard and you lift the active pigment.
- Press: Use a heat press (not an iron) set to 155°C for 28 seconds at 45 psi. Place a Teflon sheet *between* press plate and mesh. Too hot = pigment degradation. Too cold = incomplete bond → ink cracks and bleeds UV light *around* the glyph, not through it.
Assembly: Layer, bond, tension
Pin outer and inner mesh layers *right sides together*, aligning edges precisely. Sew only the top edge (brow line) and side seams—leave bottom (nose/cheek line) open. Turn right-side out. Now, here’s the trick: hand-baste the inner mesh to the outer *along the bottom edge only*, using 1mm running stitches. This creates a subtle channel for the elastic—but keeps the front surface completely uninterrupted.
Attach D-rings to each end of the powermesh elastic *before* threading it through. Then: feed elastic through the basted channel, pull taut until blindfold sits at natural brow height (not pulled down over eyes), and secure ends with a triple-reinforced bar tack—*not* a knot. Knots slip. Bar tacks hold.
Troubleshooting Light Bleed (The #1 Complaint)
If UV light leaks around the “Six Eyes” glyph or shines through the mesh unevenly, check these three things *in order*:
- Did you press at >162°C? Overheated UVR-Pro turns translucent, creating halos. Test on scrap: proper bond looks matte and opaque under normal light; under UV, only the glyph glows—no haze.
- Is your inner mesh seam allowance >2mm? Even 0.5mm extra creates micro-gaps where ambient light sneaks in and washes out contrast. Re-sew with tighter allowance.
- Are you wearing it over bare skin? MAPPA’s texture renders show zero fabric interference. Sweat, lotion, or even thin cotton undershirts scatter UV reflection. Gojo wears it direct-to-skin. So should you.
This mask isn’t meant to be “good enough.” It’s meant to vanish—so when you tilt your head under a blacklight and those eyes ignite, nobody blinks at the craft. They blink because they *believe*.