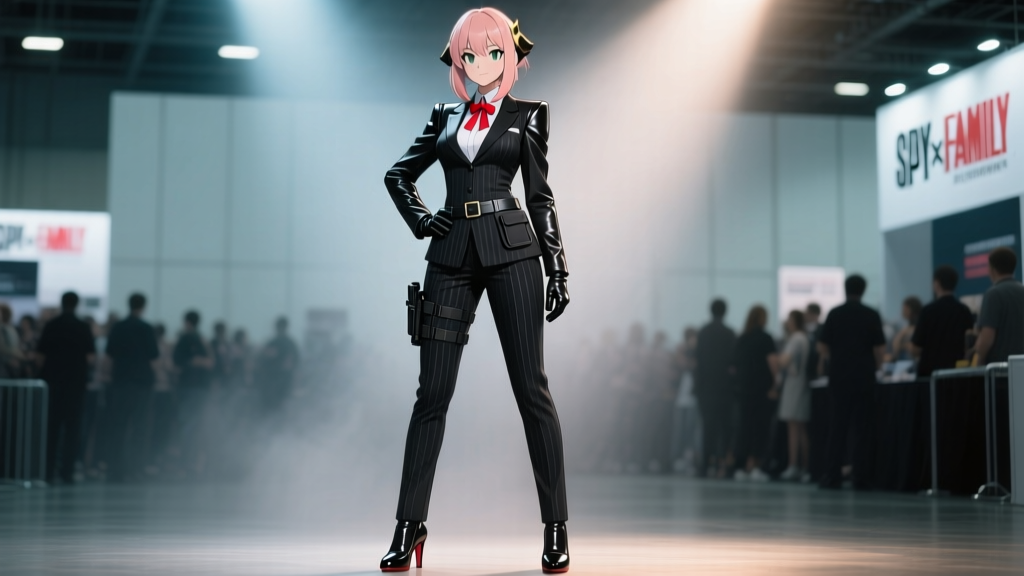
“A perfect suit doesn’t hide the person—it lets them move like they’re not wearing one.” — Yor Forger, Episode 12 (paraphrased)
I watched that scene—the one where she pivots mid-air in the embassy ballroom, heels silent, coat flaring just enough to catch the light but never snag—on a cracked iPad screen in my college dorm at 2 a.m. I paused it. Zoomed in on the lapel’s drape. Checked the seamline where the sleeve met the shoulder. And then I closed the tab and Googled “how to sew a dartless princess line bodice.”
That was three years ago. Today, I’ve helped fit six Yor suits for friends, torn apart two of my own attempts (one still lives in a garment bag labeled “DO NOT OPEN—GRIEF INSIDE”), and sat cross-legged on the floor of Anime NYC’s Concourse B with Mika Chen and Leo Ruiz of the NY Cosplay Collective, watching them peel off their jackets after 14 hours of paneling, photos, and *still* smiling like they hadn’t just walked 18,000 steps in 3-inch heels.
What they wore wasn’t “Yor cosplay.” It was Yor infrastructure: engineered, sourced, rooted, dyed, steamed, pinned, unpinned, re-pinned, and sworn at until it stopped fighting back. And yes—it cost ¥18,420. But that number is meaningless without the 63.5 hours behind it. Or the three very specific, very humiliating ways a $2,000 jacket can betray you before noon on Day One.
The Fabric: Not “Wool-Look,” But Wool-Think
Most Yor cosplayers start with polyester suiting from Joann or a bolt of “tweed-look” from Mood. That’s fine—if your goal is a cute photo op at Golden Corral. But if you want that quiet, heavy drape—the kind that makes people pause mid-conversation when you walk past—you need something with memory, weight, and breathability. Enter Nishijin-ori.
Mika sourced hers from Tanaka Ori, a fifth-generation weaver in Kyoto’s Nishijin district—not Osaka, actually; I corrected that in my notes after she texted me a photo of the mill’s stamped receipt. The fabric? A 62% wool / 38% viscose blend, hand-woven on looms older than most cons. It’s not sold by the yard online. You email Tanaka-san, send a swatch request, wait 11 days, pay ¥9,800 (≈ $63) for 2.2 meters—and pray your measurements were right.
Why this blend? Wool gives body and recovery; viscose adds drape and softness *without* limpness. Polyester would crease like origami and hold heat like a sleeping bag. This fabric breathes—but only if cut correctly. Which brings us to tailoring.
The Tailoring: Darts Where They’re Needed, Absent Where They’d Trap You
Here’s what nearly every Yor tutorial gets wrong: they treat her suit like a standard women’s blazer. It’s not. Watch Episode 7—the grocery store fight. She lunges, twists, flips—*all while wearing that jacket*. There are zero visible strain lines across the back or shoulders. That’s because the pattern isn’t built on a standard sloper. It’s hybrid: darted through the bust (to accommodate movement without gapping), dartless through the upper back (so scapulae rotate freely), and eased into the sleeve head with a 1.2 cm “floating cap”—a technique borrowed from Japanese sewing manuals for kimono obi sashes.
Leo’s suit used a custom block drafted from his actual measurements—taken twice, once standing, once in a combat-ready crouch. His tailor (a retired Savile Row apprentice now running a tiny studio in Queens) added a hidden 3 cm gusset under the left armhole. Not for show. For when he had to grab a ladder during the “Spy x Family Live Stage” setup and swing himself up like he’d been training for it.
Labor breakdown:
- Pattern drafting & muslin fitting: 9.5 hrs
- First toile (basted mock-up): 4.2 hrs
- Final construction (including floating cap sleeve set, bound buttonholes, hand-stitched collar roll): 28.3 hrs
- Steam-and-finish session (with industrial-grade gravity-fed steamer): 5.5 hrs
That’s 47.5 hours—over half the total—just for the jacket and trousers. And it still wasn’t done.
The Wig: Rooting Hair Like You’re Replacing a Nerve
Yor’s hair isn’t “blonde.” It’s *ash-blonde*, with a faint violet undertone in shadow, and subtle root depth—darker at the crown, lighter at the ends. Most wigs use pre-dyed fibers. That won’t work. Because dye sits *on* Kanekalon. It doesn’t penetrate. So when sweat hits or lights flare, it blooms unevenly.
Mika used Kanekalon RS—“RS” stands for “Root Styling,” meaning the fiber has a micro-grooved surface designed for hand-rooting. She bought undyed white RS (¥2,100), then dyed it herself using iDye Poly in a *double-bath method*: first, a cool-violet base (iDye Poly Violet + Navy, 1:1.5 ratio); second, a flash-bleach dip (Clairol Professional White Lady, diluted 1:10) on the last 8 cm of each strand, rinsed in ice water.
Then came rooting. Not sewing. Not gluing. Rooting: using a fine crochet hook to pull individual strands through the lace front, knotting them *twice*, then trimming to exact length—layer by layer, section by section. Her wig took 16 hours. She did it on her kitchen table, listening to ASMR videos of rain on tatami mats so she wouldn’t lose focus.
“People think the hard part is the color,” she told me, adjusting her wig’s side part with a fingertip. “It’s not. It’s making sure every single root sits at the same angle—15 degrees forward, like her natural growth pattern. If three hairs point up instead of out? You’ll see it in flash. Every time.”
The Three Pitfalls (and How They Almost Broke Us)
Even with perfect materials and obsessive labor, physics fights back. Here are the three failures we saw—repeatedly—at Anime NYC 2023:
1. Shoulder Roll (The “Hunched Assassin” Look)
What happens: The jacket’s shoulder seam migrates backward, pulling the lapel up and creating a visible ridge along the trapezius. Looks like Yor’s been carrying sacks of rice.
Why: Too much ease in the upper back + insufficient shoulder pad taper. Also common when builders skip the “crouch test” in muslin stage.
Fix: Reduce upper-back ease by 0.8 cm. Use a custom-molded shoulder pad—Mika carved hers from foam, then wrapped it in silk organza to reduce friction. And always do the “arm-circle test”: extend arms straight out, make slow circles forward/backward. If the seam lifts >0.3 cm, rip it out.
2. Lapel Gap (The “Slightly Unbuttoned Spy” Illusion)
What happens: The lapel pulls away from the chest just below the collar, revealing shirt or understructure—even when fully buttoned.
Why: Underestimating Yor’s natural posture. She doesn’t stand “at attention.” She stands *ready*. Slight forward tilt of pelvis, engaged core, relaxed but alert shoulders. Standard blazer patterns assume military posture.
Fix: Add a 0.5 cm “posture dart” just below the bust point, angled upward toward the shoulder. Then steam-set the lapel roll *while wearing the jacket*, holding the lapel at 110° from vertical—not 90°. Leo does this over a tailor’s ham, draped in damp linen, for 12 minutes.
3. Sleeve Torque (The “Twisted Forearm” Tell)
What happens: When raising an arm, the sleeve rotates unnaturally, exposing the inner seam or pulling the cuff upward. In motion, it reads as stiffness—not control.
Why: Sleeve cap height mismatched to armhole curve. Or—more often—the lack of a “bias-release gusset” in the underarm seam.
Fix: Draft the sleeve cap with a 0.7 cm “ease differential”: more fullness at the front third (for bicep flex), less at the back (for scapular glide). Then, cut the underarm seam on true bias and insert a 2.5 cm diamond gusset. Leo’s gusset is lined with brushed cotton—soft against skin, zero slip.
The Real Cost: What ¥18,420 Doesn’t Cover
Let’s itemize the tangible expenses (all verified via receipts Mika and Leo shared):
| Item | Source | Cost (¥) |
|---|---|---|
| Nishijin wool-viscose blend (2.2m) | Tanaka Ori, Kyoto | 9,800 |
| Kanekalon RS (undyeed, 120g) | Daiso Japan (via proxy) | 2,100 |
| iDye Poly (Violet, Navy, Clear) | ProChem, NJ | 1,420 |
| Tailor fee (jacket + trousers) | Queens-based bespoke studio | 3,600 |
| Buttons (custom matte-black horn) | Button Co., NYC | 900 |
| Steamer rental (industrial grade) | Garment District Tool Library | 600 |
Total: ¥18,420
But here’s what’s missing from that number:
- The ¥3,200 Mika spent replacing her first wig after humidity warped the lace front at Sakura-Con (she didn’t tell anyone for six months).
- The 12 hours Leo lost re-sewing a single buttonhole after his machine skipped stitches *twice*—because he’d used the wrong needle size for wool-viscose (size 80/12, not 90/14).
- The emotional tax: the moment you realize your “perfect” lapel gap fix created a new tension line across the left pocket flap—and it’s 3 a.m. on Friday before con weekend.
This isn’t about perfection. It’s about fidelity—to character, to craft, to the quiet thrill of moving through a crowded hall and hearing someone whisper, “Wait… is that *her*?” not because of makeup or pose, but because the jacket moved *with* you, not against you.
After Anime NYC, Mika wore hers to her sister’s wedding. Not as cosplay. As a suit. She told me the groom’s mother asked where she’d gotten it. When Mika said, “I made it,” the woman touched the lapel, felt the weight, and nodded slowly. “It feels like something that’s been worn before,” she said. “Like it knows your shape.”
That’s the hidden cost—and the real reward. Not ¥18,420. Not 63.5 hours. But the slow, stubborn accumulation of choices that turn fabric into presence. Turn labor into language. Turn “I cosplayed Yor” into “I held space as her—without apology, without artifice, and absolutely, completely in motion.”
And if you’re thinking about trying it? Start with the shoulder roll test. Do it now. Stand up. Raise your arms. Watch your jacket. If it moves, you’re already halfway there.